
At the end of this page you have a session that hears your room, a link and a QR code for your audience, and you know how to go live.
The Portal has a guide for the same ground. Open Getting started in the sidebar: each step turns green on its own once it is set up, and the guide disappears when they all are.
Before you start
- A member role that can create sessions, such as Organizer or Admin. See Requirements.
- Something that hears your room: the computer you are on, a computer at the sound desk, or a stream you already send.
Steps
Sound reaches InterScribe in one of three ways. This computer needs nothing installed: you pick a microphone or an audio input in your browser. A machine at the sound desk runs the InterScribe agent on a computer that stays at your venue, with a cable from the mixing desk. A stream you already have sends an existing stream to InterScribe. You can change your mind later. The steps differ by path.
With a machine at the sound desk or a stream
- STEP 1Create a room
Go to Rooms & audio, select New and choose Room. Give it a name people will recognize. The room gets its own AV channel, named after it, and every session in that room takes its sound from that channel.
- STEP 2Connect the sound
On the room's page, select Set up a desk agent for a machine at the sound desk, or Add an ingress for a stream. You can also select New and choose Connect audio on Rooms & audio. See Set up the desktop agent.
- STEP 3Hear your room
On the room's page, select Check audio and play anything into the desk. The check runs for five minutes, whether or not an event is on, and your audience hears nothing.
- STEP 4Create the session
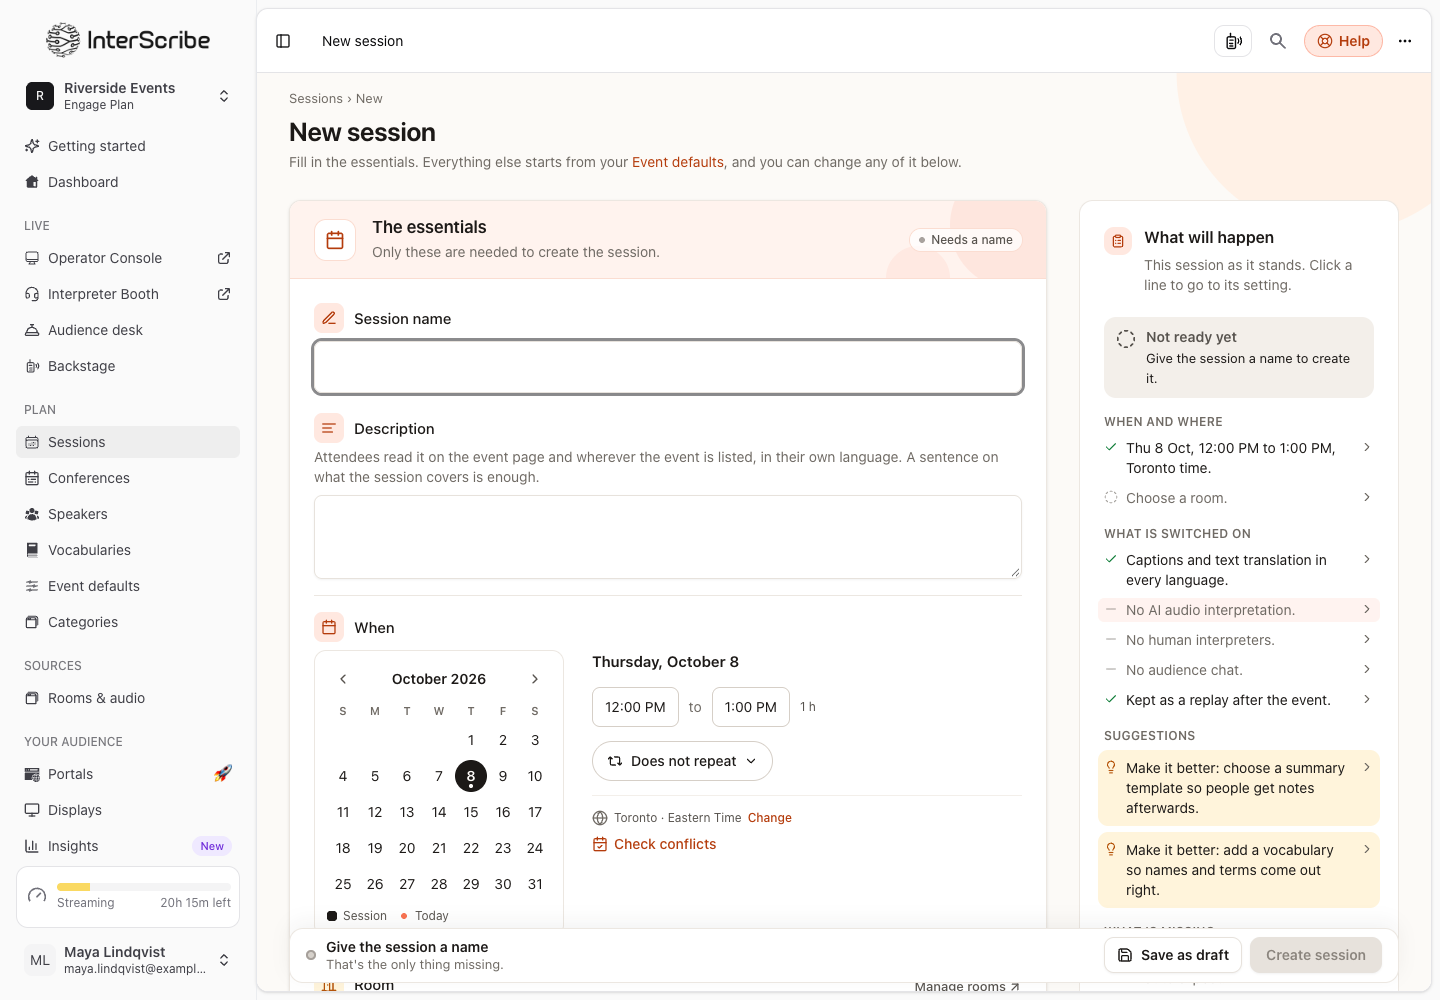
Go to Sessions, select New and choose Event. Fill in Session name, When, Room and Speaker language, then select Create session. Audio source follows the room's channel. Everything else starts from your Event defaults and can wait.
With this computer
- STEP 1Create the session
Go to Sessions, select New and choose Event. Fill in Session name, When and Speaker language. Under Audio source, choose Computer (web browser), or Use a computer if you chose a room. Then select Create session.
- STEP 2Plan to go live from that computer
The sound comes from the computer you go live from, so open the Console on the computer that has the sound. See Go live from the Console.
Then, on every path
- STEP 1Share it with your audience
On the session's page, select Share. Copy the link, or download the QR code and put it on a poster or on the screen. Scanning the code opens the same page.
- STEP 2Go live
On the session's page, select Go live. The Operator Console opens in a new tab; press Go live there when you are ready.
Check it worked
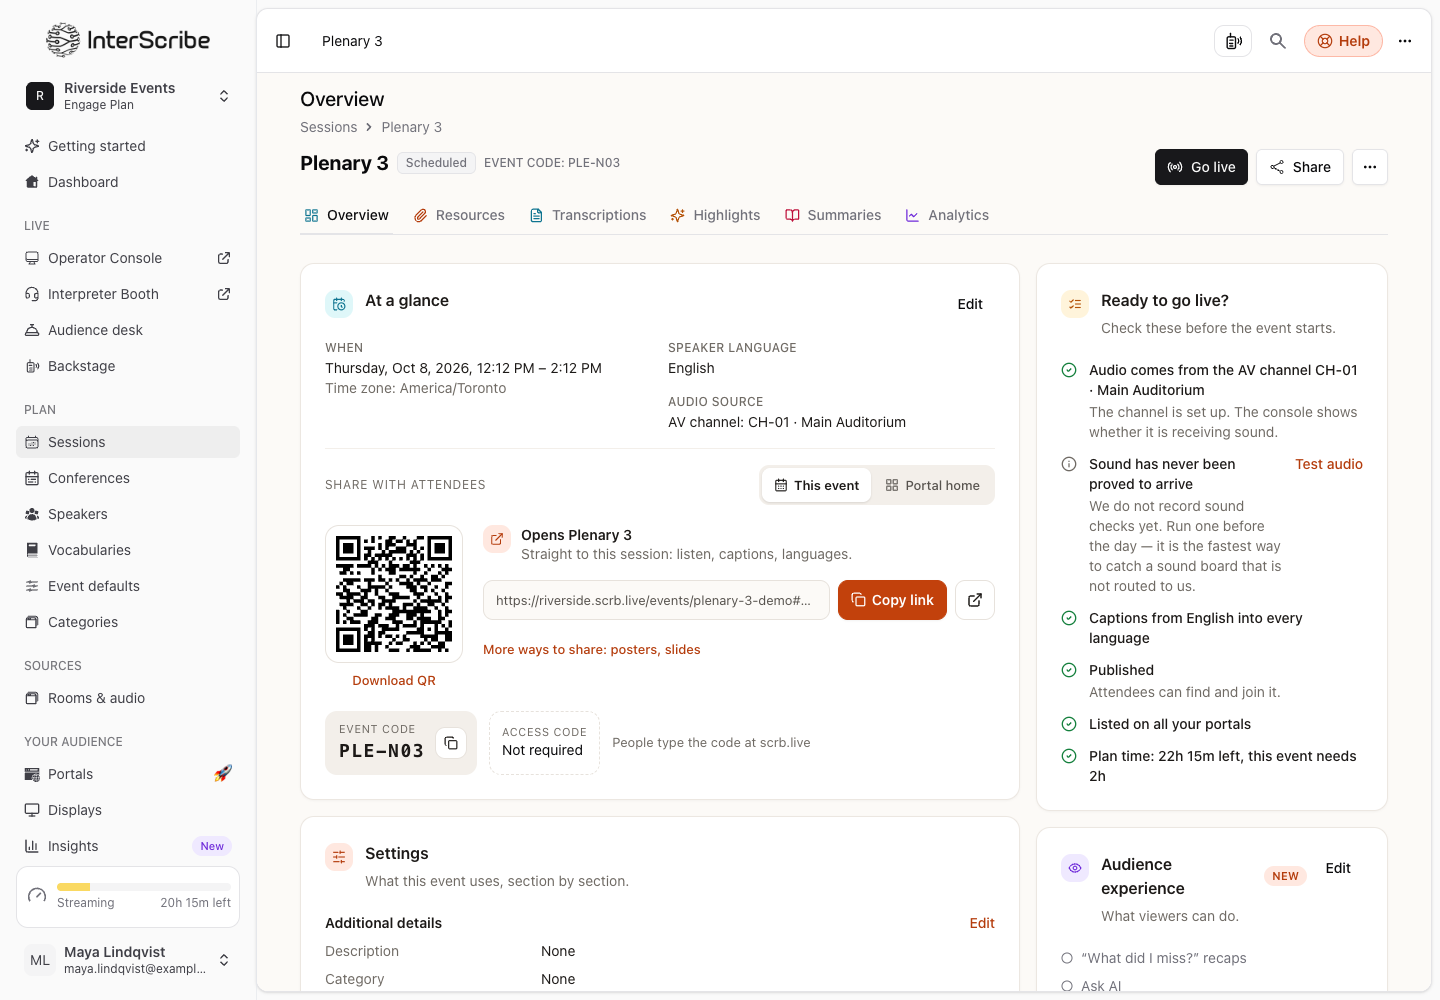
- The session's page shows Ready to go live? with each item marked Ready, Needs attention or Good to know. Select Fix next to anything that needs attention.
- Before you create the session, the What will happen panel says Ready to create and Published, so attendees can join.
- Your audience chooses their own language when they arrive. You do not pick it for them.
Where to go next
- How the pieces fit together: rooms, channels, sessions, the Console and the Booth.
- Sessions and recurring sessions: every part of the session form.
- Languages: the speaker's language, translations and voices.