
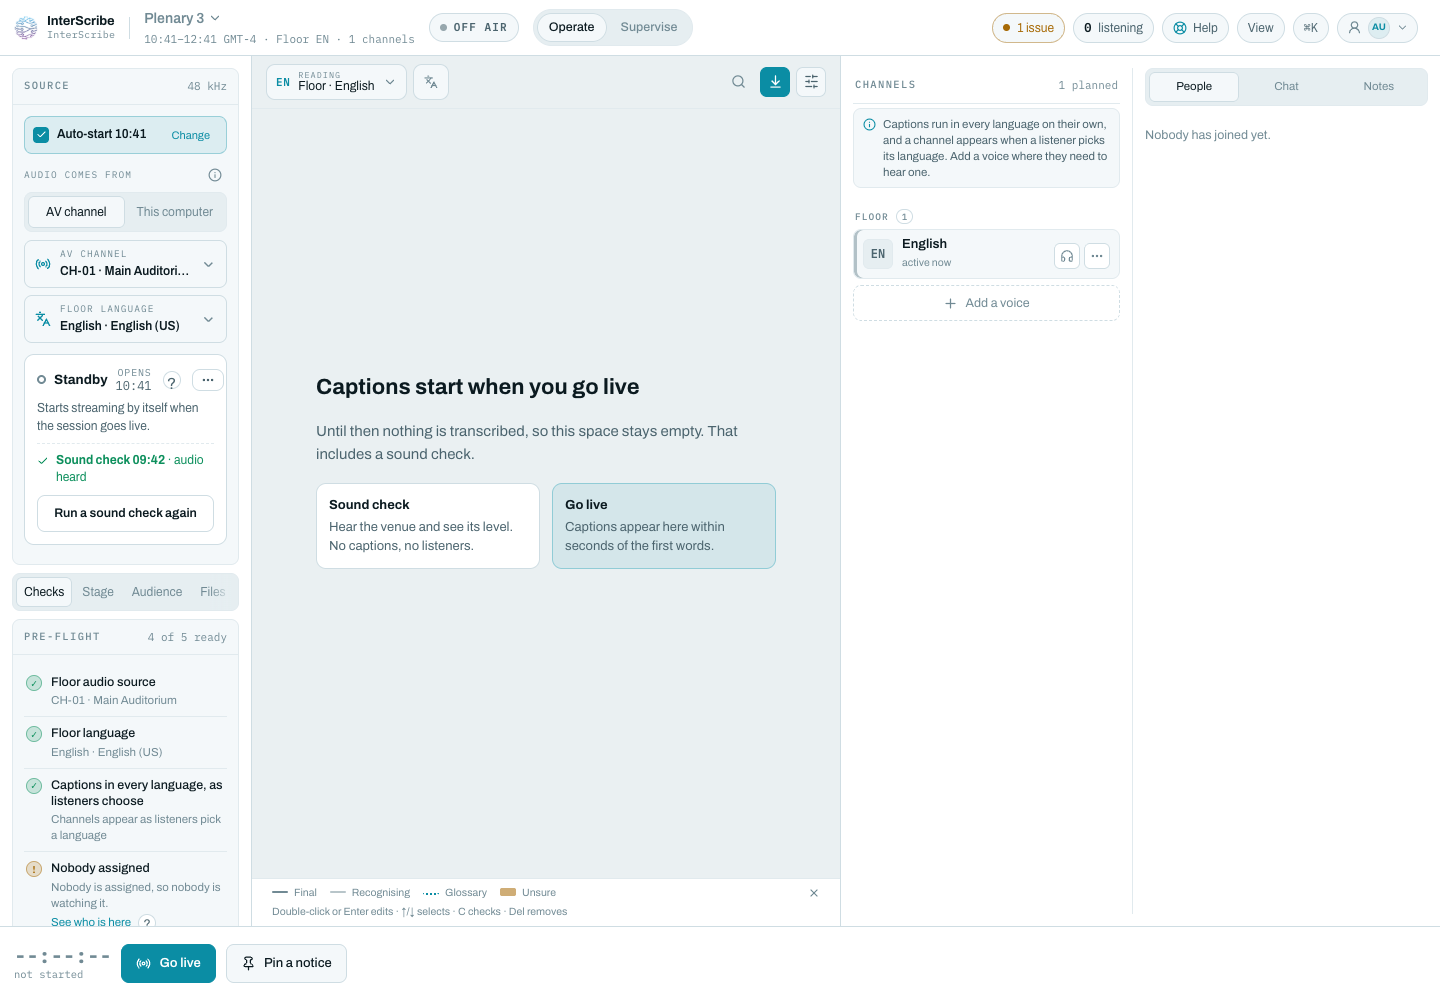
The Console is where one person runs a session: the audio coming in, the languages going out, and a check of everything before you go live. Here is the whole screen, before the session starts.
From standby to live, step by step
- STEP 1Choose where the audio comes from
An AV channel (the room’s agent) or this computer’s microphone. Rooms own their channel, so it is usually picked for you.
- STEP 2Run a sound checkSpeak into the microphone. “Audio heard” means the whole path works, from the room to InterScribe.
- STEP 3Clear the pre-flight listEvery amber item says what is missing and links to the fix. You can go live with warnings.
- STEP 4Go liveOr leave auto-start on and the session goes live by itself at its start time.
That badge measures this computer’s connection to InterScribe. Amber or red means the trouble is on the network, not in the Console. Read “My Wi-Fi is strong but…”
The Console in more detail
Open the Console from Operator Console in the Portal's menu.
In the Source panel, under Audio comes from, choose an AV channel (the room's agent) or This computer, its own microphone. Select Run a sound check and speak into the microphone at the desk: Sound check with the time and audio heard means sound reached InterScribe from the room. Every pre-flight item that is not ready says what is missing, and most offer a button that takes you to the fix. To go live, select Go live, then confirm. If the badge is not Good, The connection badge explains each state. To hear your own microphone while it is the floor, see Hear yourself while you speak.
What going live does
When you confirm Go live, everyone holding the audience link is let in at once, transcription starts and every channel begins publishing captions. Interpreters can take their booths, and the recording starts if the session records.
Choose your microphone type
When This computer is the floor, open the Input device list in the Source panel and find Microphone type. Sound desk, the default, sends the microphone exactly as your desk sends it. Choose Headset to clean up echo and noise. More settings lets you switch Echo cancellation, Noise suppression and Automatic volume one by one. On a phone, the same setting is in the floor microphone's options. Changing it while you are live cuts you off for a moment. See Hear yourself while you speak.
While you are live
The bar at the bottom holds what you reach for during the session:
- Transcribing: pause transcription, or Resume transcription.
- AI voices: pause every AI voice at once, or Resume AI voices. See Voices in the Console.
- Announcement: send a message to listeners, or pin a notice. See Pin a notice.
- Music playing: sends listeners a card saying that music is playing.
- End session: ends the session for everyone, after you confirm.
To take a caption back from every listener, select the × beside it in the transcript. See Remove a caption.
To change the floor language during the session, see Floor language.