🗓️ Creating & Editing Sessions
Learn how to create, configure, and manage your live sessions or events.
- Author
- by Admin User
- a year ago
📅 Overview
In InterScribe, a session represents one live event — such as a service, meeting, webinar, or hybrid conference. Sessions are at the heart of everything you do.
This guide gives you a complete overview of how to:
- Create new sessions
- Configure interpretation and audio input
- Schedule recurring events
- Add context and vocabulary for improved AI performance
- Edit existing sessions before or after going live
Whether you're new to the platform or managing complex event workflows, this guide is your go-to resource.
💡 If you’re just getting started, we recommend walking through Your First Event – Step-by-Step for a quick-start visual tutorial.
🧭 How to Create a Session (Full Flow)
1. Open the Dashboard
Log in to your InterScribe account and click New Session.
2. Name & Describe the Event
- Title – Give your event a clear name (e.g. “Sunday Service” or “Town Hall – Q3”).
- Description – Optional text shown on your portal and attendee view.
💡 Tip: Keep your description short and relevant. This helps your audience understand what the session is about before joining.
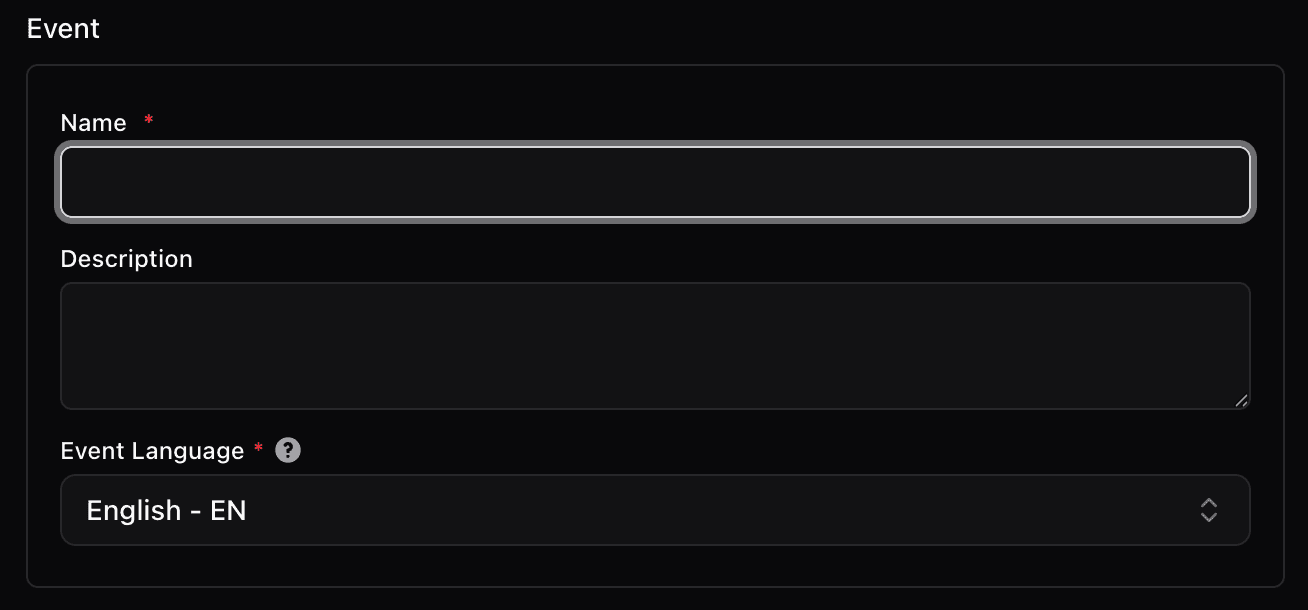
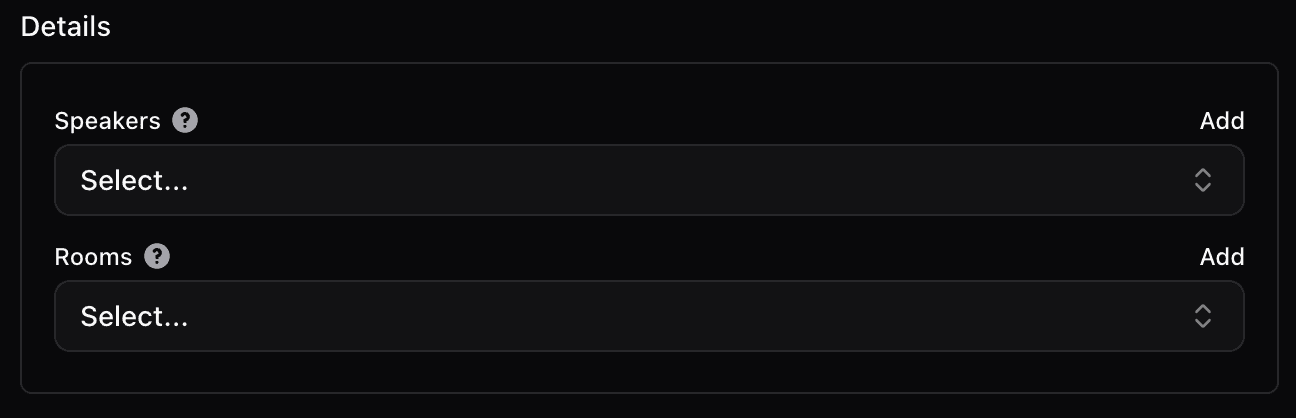
You can also select or create Speakers and Rooms:
- Speakers help personalize the experience.
- Rooms provide consistent entry points (e.g. a church's "Main Hall").
3. Set Visibility
Choose how attendees will find and access your session.
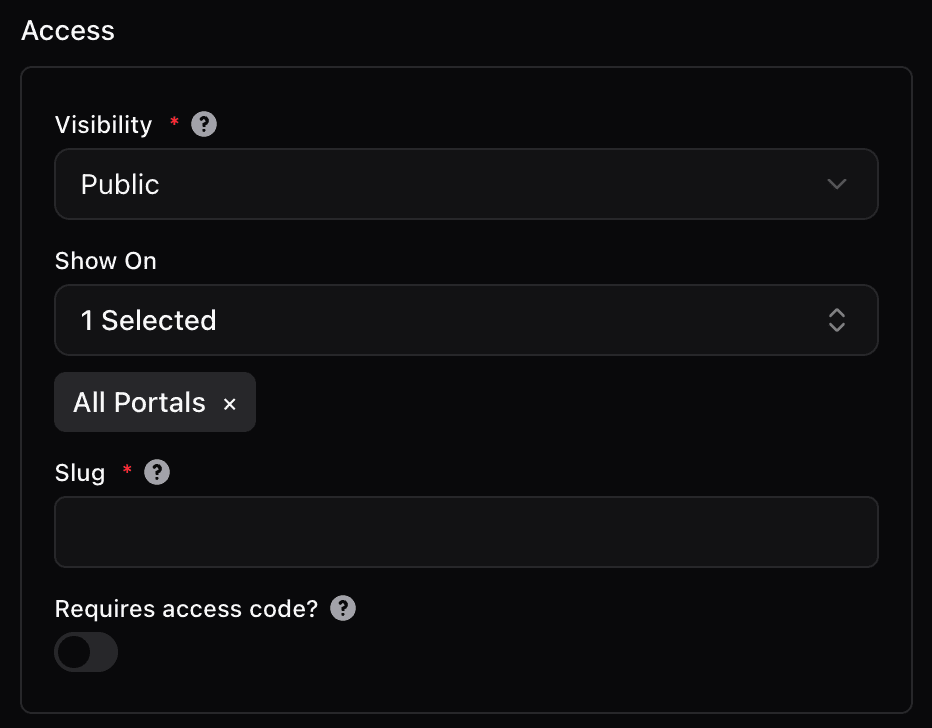
Private (Code Only) – Not listed publicly. Only accessible via link or QR code.
Public (Portal) – Appears on your branded InterScribe portal.
- You can require a passcode even for public events.
- If you manage multiple portals, choose which one to list the event on.
4. Schedule the Time
One-Time Event – Pick a specific start and end time.
Recurring Event – Automate weekly, monthly, or custom schedules.
- Choose a repeat interval (e.g. “Every Sunday”).
- Set a final date — this prevents endless recurrences.
Auto‑Start – Sessions can begin automatically, or be manually started from your dashboard.
💡 Tip: Use recurring sessions for services, trainings, or classes you host frequently.
5. (Optional) Add a Video Source
If you want attendees to watch video along with captions or voice translation:
- Paste a YouTube or Vimeo link.
- InterScribe adds a short delay to keep captions and voice synced with the video.
- Viewers can control playback volume and translation preferences.
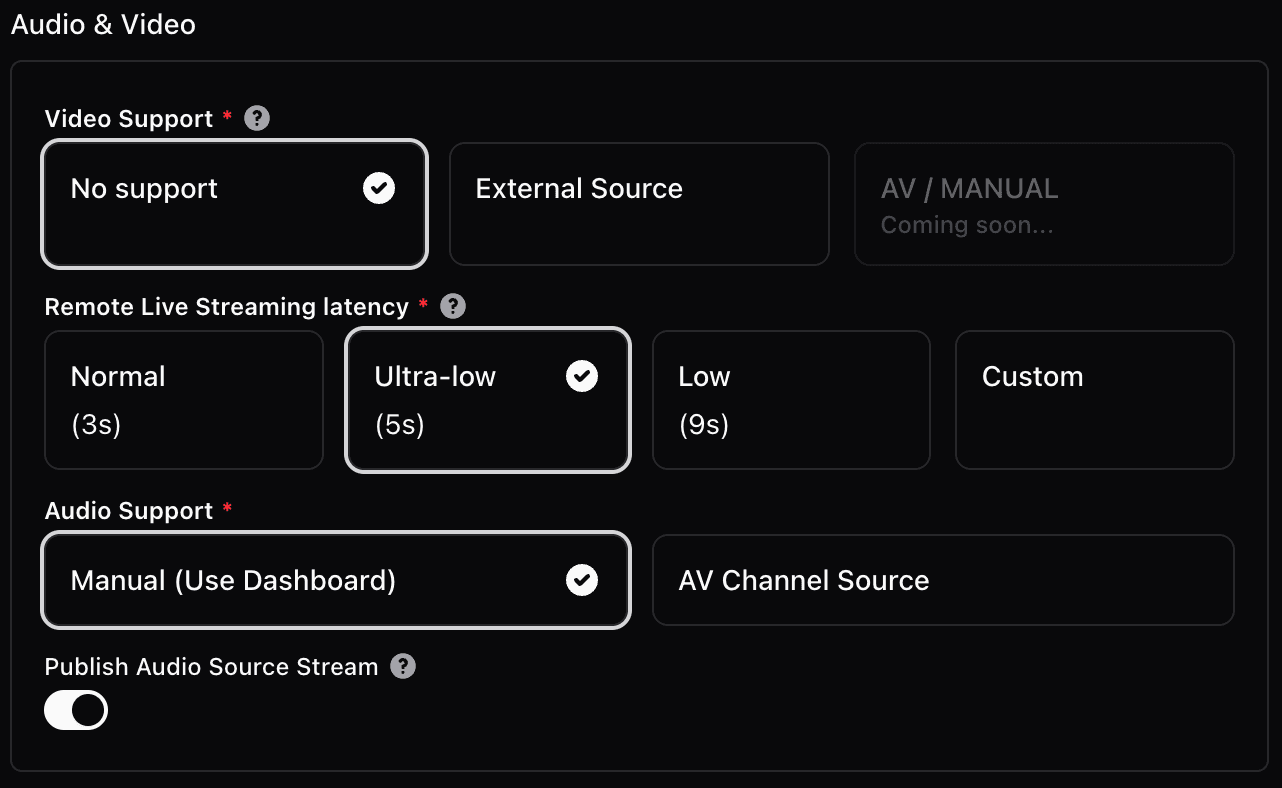
6. Choose Your Audio Input Method
InterScribe supports a variety of ways to send live audio into your session. Your setup determines whether you’ll use the Streamer Dashboard or stream audio via an AV Channel.
🔧 Step 1: Select the Audio Source Type
When creating your session, you’ll be prompted to choose your audio input type:
- Manual (Use Dashboard) – for using the Streamer Dashboard
- AV Channel Source – required for Desktop Agent, Web Agent, or RTMP/SRT/WHIP
✅ Choose “Manual (Use Dashboard)” if:
- You plan to use the built-in Streamer Dashboard from a browser (desktop or mobile)
✅ Choose “AV Channel Source” if:
- You're using any other method to stream audio (Desktop Agent, Web Agent, OBS, etc.)
🟢 Streamer Dashboard works with or without an AV Channel. If an AV Channel is assigned to the session, the Dashboard will automatically infer and use it — no manual channel selection required.
🎛️ What Is an AV Channel?
An AV Channel is a virtual routing label that connects your audio input (from a tool or agent) to a specific session.
You must configure AV Channels in two places:
- In the session (under "Audio Source")
- In the agent or tool you're using to stream (e.g., Desktop Agent or OBS)
This ensures that InterScribe knows which audio stream belongs to which session.
⚠️ If the AV Channel doesn't match between the session and the source, no audio will be received.
🎙 Audio Input Options
| Method | Best For | AV Channel Required? |
|---|---|---|
| Streamer Dashboard | Browser-based streaming from a mic or mixer | ❌ Optional (auto-infers if set) |
| Web Agent | Lightweight agent for public/shared-use computers | ✅ Yes |
| Desktop Agent | Persistent AV environments (Mac/Windows/Linux) | ✅ Yes |
| Mobile Browser | Interpreters using Safari or Chrome on phones/tablets | ❌ No (uses Dashboard mode) |
| AV Ingress (RTMP/SRT/WHIP) | Pro broadcast setups (OBS, vMix, vdo.ninja) | ✅ Yes |
⚠️ Important Notes
- Streamer Dashboard is the easiest option for most hosts. If you assign an AV Channel to your session, it will be automatically picked up — no manual channel selection needed.
- Mobile Browser streaming works just like the Streamer Dashboard.
- Desktop Agent, Web Agent, and AV Ingress must be manually linked to the same AV Channel configured in the session.
- AV Ingress introduces natural streaming delay (due to RTMP/SRT/WHIP protocols). It’s best used for online-only events — not recommended for in-person audiences who need real-time experience.
🛠 Need to manage AV Channels? Visit Dashboard → A/V Inputs → Channels to create, name, and configure channels with their corresponding keys.
📘 See Platform Overview & Requirements for setup guides.
7. Configure Interpretation Options
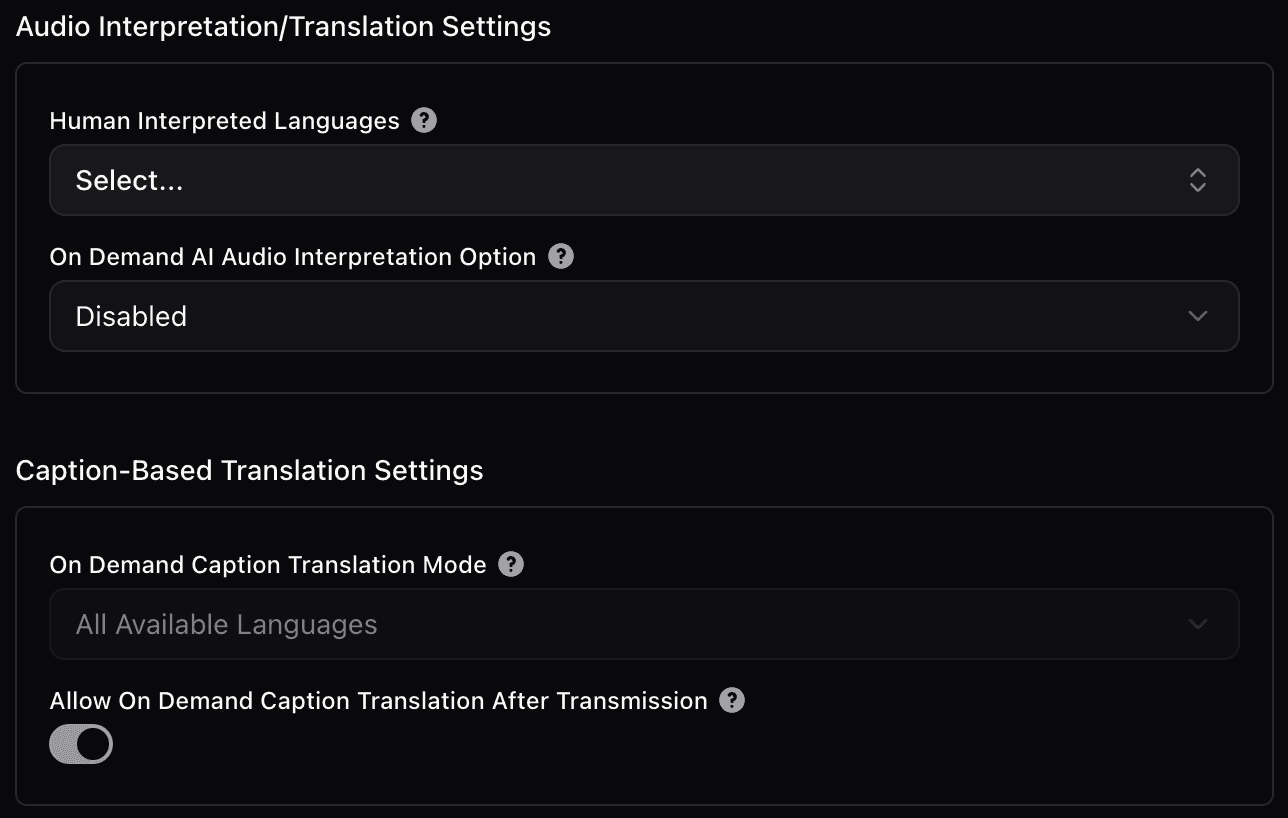
InterScribe supports multiple translation and voice delivery options:
- ✅ Live Captions & Translations – Enabled by default. Converts spoken input into 100+ written languages instantly.
- 🗣 AI Voice Interpretation (Beta) – Natural-sounding voices read translations aloud. One language included per session. Add more as needed.
- 🖥 In-Device Text-to-Speech – Lets attendees’ own devices read captions aloud using browser voice. No extra cost.
- 🎧 Human Interpreters – Assign interpreters by language. Invite them via email directly from the setup screen.
💡 Tip: Mix and match. Use AI for Portuguese and a human interpreter for Spanish, for example.
8. Add Context & Glossary
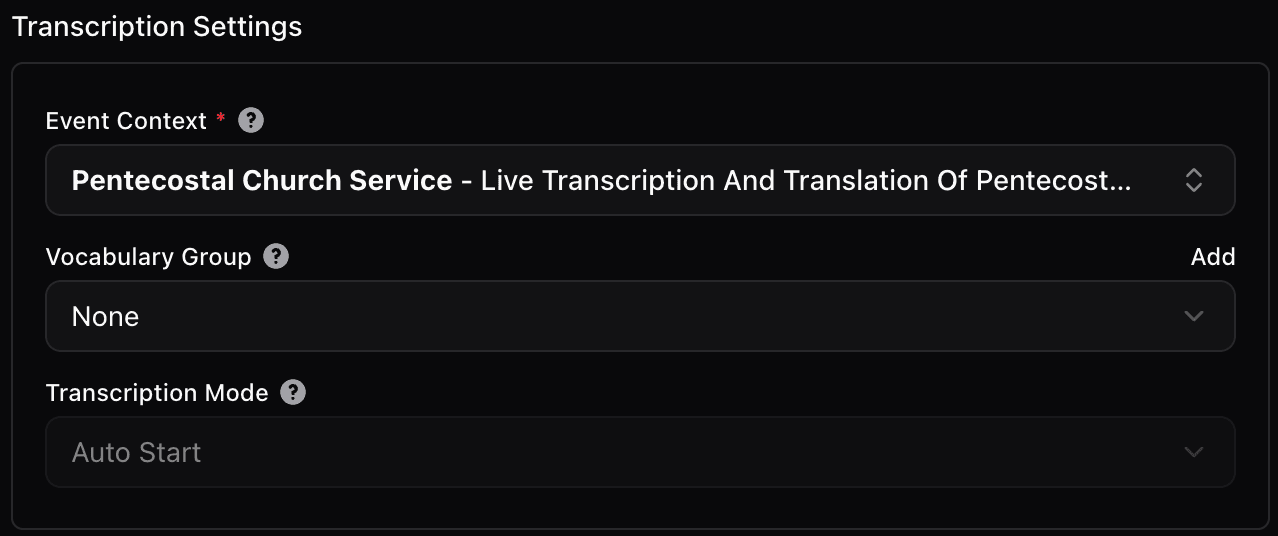
This helps improve transcription and translation quality — especially for unique names, acronyms, or technical language.
Context – Briefly describe the topic or format of your session (e.g. “Worship and preaching” or “Medical AI conference panel”).
Glossary – Add key terms, people, or concepts.
- Boost terms you want prioritized
- Replace words commonly misrecognized
- Block terms you don’t want spoken or shown
9. Finalize & Create
Review your setup. When ready, click Create Event. Your session will now appear on your dashboard and portal (if set to public).
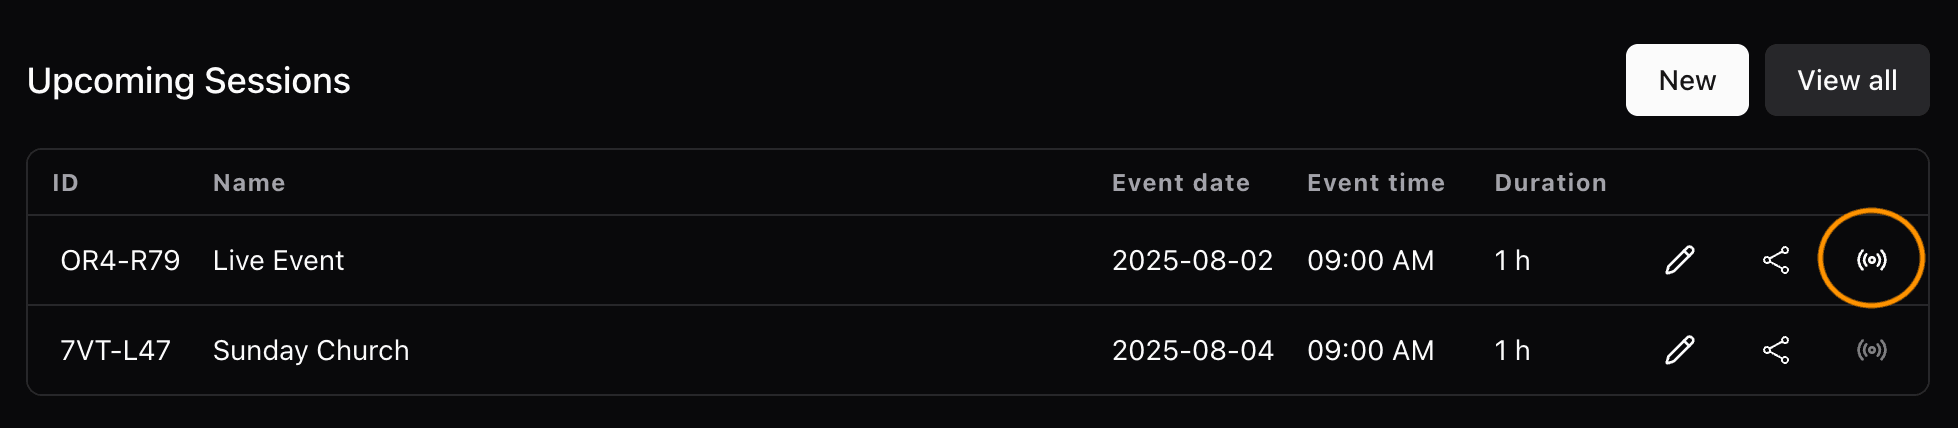
10. Go Live
- Click the Streamer icon beside your session.
- Choose your audio input (mic, interface, stream).
- Press Start Streaming.
- (Optional) Click Start Event to open the room early.
- InterScribe begins real-time transcription, translation, and interpretation.
11. Your Audience Joins
Attendees can access your event via:
- QR code
- Direct link
- Your branded portal
They can:
- Select a language
- Read captions
- Listen to voice translation
- Save notes or highlights (if using InterScribe Anywhere)
🔁 Managing Recurring Sessions
Recurring sessions help streamline repeated events.
How to Set Up
- During session creation, under Schedule, select Recurring Event.
- Choose your interval (e.g. Weekly, Monthly).
- Set the time and days.
- Define an end date.
Managing Recurrences
- Edit recurrence pattern – Updates only future sessions.
- Edit one occurrence – Modify individual dates without affecting others.
- Delete one occurrence – Removes that date; the rest remain active.
✏️ Editing Existing Sessions
You can update a session at any time:
| What You Can Edit | Notes |
|---|---|
| Title & Description | Updates appear instantly |
| Schedule & Recurrence | Adjust time or pattern; use caution with recurrences |
| Visibility | Switch between Public/Private without breaking links |
| Languages & Interpretation | Add/remove languages or reassign interpreters live |
| Context & Glossary | Immediate effect on recognition accuracy |
⚠️ Preferences Reminder: Settings in Preferences → Events & Sessions only apply to new sessions. Existing events remain unchanged.
✅ Best Practices
- Set your time zone correctly in your profile.
- Test your audio before going live.
- Use Rooms for QR-stable venues like classrooms or sanctuaries.
- Schedule in advance and reuse recurring sessions to save time.
- Encourage attendees to choose their language before the event starts.
❓ FAQs
Can I delete a session? Yes. Open the session by clicking Edit, scroll to the bottom of the page, and click Delete. This action is permanent and cannot be undone.
Can I reuse a session’s setup? There’s no “Clone” button, but there are three ways to avoid repetitive setup:
- Use recurring events for repeated sessions (e.g. weekly services)
- Manually recreate the session using the same options
- Set default configurations under Settings → Customization to pre-fill your preferred language, audio, and interpretation settings for all new sessions
💡 Tip: Default settings won’t change existing sessions but will apply automatically when creating new ones.
Can I change interpretation options during a session? Yes. You can switch interpreters or add AI voice channels live. Attendees may briefly hear a transition, but won’t be disconnected.